Table View の勉強02〜セル(行)の右端に矢印をつける
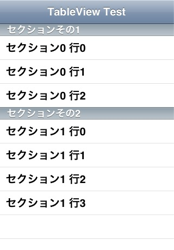
前回は、下記のように基本的な表示をする部分まで実装した。

手順
前回のソースに関数をまるごとコーディング追記する。
注意
Storyboardからではなく、コーディングレベルで設定する必要がある。
ソース
※今回コーディングした部分のみ
.m
//デフォルトでは存在しないので、以下を丸ごと追加
- (UITableViewCellAccessoryType)tableView:(UITableView *)tableView
         accessoryTypeForRowWithIndexPath:(NSIndexPath *)indexPath
{

    if( indexPath.section == 0 ) {
        // セクション0なら
        if( indexPath.row == 0 ) {
            // ○で囲まれた>
            return UITableViewCellAccessoryDetailDisclosureButton;
        }else if( indexPath.row == 1 ) {
            // >のみ
            return UITableViewCellAccessoryDisclosureIndicator;
        }else if( indexPath.row == 2 ) {
            // >のみ
            return UITableViewCellAccessoryDisclosureIndicator;
        }else {
            // ○で囲まれた>
            return UITableViewCellAccessoryDetailDisclosureButton;
        }
    }else if( indexPath.section == 1 ) {
        // セクション1なら
        // ○で囲まれた>
        return UITableViewCellAccessoryDetailDisclosureButton;
    }
    return UITableViewCellAccessoryDetailDisclosureButton;
}
参考
これについては下記もとまかさんのページをそのまま参考にしてうまくいった。
http://d.hatena.ne.jp/moto_maka/20090124/1232740852
次回以降
実際にセルを選択してview遷移する部分を実装したい。
